
Setting up an off-grid kitchen garden for the boomstead.

Where to start? Observation and Questions to ask your self? Grab your favorite beverage and scan the sight with your partner if you have one. Your looking for the optimal sight for your food to grow. Where d o you get enough sun for your growing needs? Where is the wind coming from? What are the native plant species and living animals in the area that might become partners or pests? The goals is to work with nature not against her.
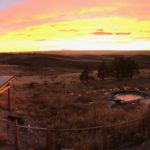
Pick the Site & Prep the Area: Now that you have found the perfect spot for you kitchen garden it is time to prep the area. We picked an area facing south with zero to little shade. (shade can be your friend come mid summer, but we are prepared to add the shade where needed with mini hoop houses and shade clothes over the beds). The kitchen garden should be relatively close to your kitchen, if that wasn’t obvious. So don’t pick a spot on your acreage where you will regret the mileage and effort going to a from your prep/storage station.

We have been using this area for storage containing: original piles of compost delivery for our swale projects since buying the land in 2013 , wood chip piles form helping take down a tree that was in the road that we didn’t want to go to waste and an accumulation of left over parts/junk from projects finished, that will hopefully be used in some other way. Along with a work table that has been used to make 3 hoop house (2 for us and 1 for our neighbor, a blog on hoop house building will be posted soon) plus a large pile of cardboard boxes we have been saving for this very Kitchen garden project for the lasagna garden bed.
Remove the Yucca and Junk
It only took about 2 days worth of work but we managed to clear all the yucca plants from the grow area, remove all the pallets and random pieces of wood and junk that had accumulated into new organized piles and Built a shed for all our garden tools. We were gifted this shed from our parents and very thankful – it has been a great addition to the organization of tools on our property. Slowly, but surely the food forest will grow. It all starts with doing. Even the little things count like staying organized.

Rent-A-Tiller
Renting tools for projects always has to be seriously considered , we live about 35 miles from the nearest home depot, and making the tool rental count takes a lot of planning and action. Guy got up early the day of tilling, rented the Hydraulic Rear Tine Tiller and made it back before 11am for us to knock out the project before winter sunset which is like 4:30pm that day so we could return it the next day before getting charged for an additional day of use. While Guy was at the store, I finished up spearing the last Yucca out of the area and moved all the boxes out of the space we decided will be used for the 6 long – 25ft beds. Now there is a lot of debate in permaculture whether tilling the landed is needed and/or if it causes more harm than good. I think for each sight this needs to be considered. For our land, we have a very clay, compacted soil with a dense prairie rooted top layer. We decided it was best to break up this area up before adding our top soil so the micro nutrients and amendments added can gain easier access into the earth to establish the beds for optimal growing conditions.

Forming the beds – choosing the right bed size.
Length of bed depends on how much space you decided to make your kitchen garden; however width of bed we decided to go with 30” because it has become the common size in the market Gardner realm and the Tools all come in this size for ease of use and prep time. We are not a market garden yet, but life is all about making the most of time, and we like to not waste it where others have found efficiency.

We made 6 beds 25’ x 30”; we added all the left over soil and compost we had on our land on to the prairie clay soil we had tilled up and then added black landscaping fabric to protect it from the sun and snow but help the moisture get in to the beds during the winter and spring. We will add new compost and soil-amendments at the start of spring when we go to plant.
The Lasagna Garden Bed
The second half of our kitchen garden is a “U” shaped layered bed. We did not till this area, we lined the bottom layer with all the old cardboard boxes and compostable accumulated items. We added a layer of compost onto the the boxes and then a layer of straw and repeated that until we ran out of soil and straw . We will add another layer of compost; when we get the 16 ton delivery in spring.
We plan on using this bed for native perennial plants species and pollinator friendly plants. Which can be one in the same like Russian sage, milkweed, marigolds, white clover, lead plant, catnip and cat mint, echinacea, etc.
How will you Water and feed the garden?
This is where good soil is important. The better the soil the better nature will do its magic to utilize the water efficiently. Running a soil ph test is a good place to start to find out the N(Nitrogen), P(Phosphorus) , and K (Potatissium) Levels in the soil you are working with and what type of amendments and fertilizers will need to be added based on your . I.e. fish emulsions, rock powders, manure, composts, various bone meals worm castings, etc. All of this is not added to your soild, it all depends on the site and what it is needing. Wood chips and or some type of ground cover can help the soil not dry out once we have planted and established the beds. Companion planting with white cover or other cover crops is a great way to fix nitrogen into the soil. We are not going to do in in ground irrigation this year; we will self water with cans. We don’t have a well (it is expensive and on our to-do list) but we have a 1200 gallon above ground holding tank for outdoor watering use and water is delivered when we need it.
Adding a Fence to keep out the pests:
We live in the middle of no where on 35 acres but no where to us does not mean no where to nature. We realize we live in other mammals natural habitat so we will do our best to keep them out of areas we would not like them to go. This has been a very mild winter and we were able to dig all 12 holes in the past couple months. We dug 6 of them last weekend. After we hammered out the holes we nailed up a 5 foot fence from the top down and we still need to add a guard to the bottom to keep out those “pesky lil wabbits” (best said in Elmer Fud voice).

We also need to add two gates to west and east sides. We went with two gates because we have a shed on the west side and compost/soil deliveries will come in on the east side.
Once we finish the bunny guard and gates , we are ready for the best part that can also seem overwhelming – Order seeds and Planning the 2018 Kitchen garden – Blog post coming soon to help break down the ordering and planning process.